Slaying Dragons, Part 3 - Designing the Cabinet
If you need to catch up with the story, the previous posts can be found here:
The Design
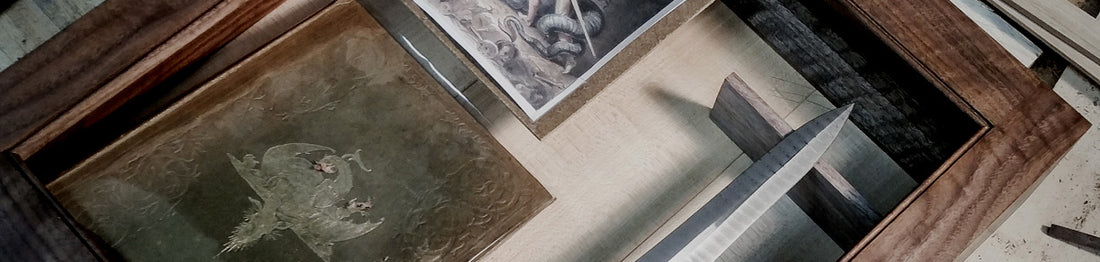
Once the size of the sword was defined, the next step was to define the overall layout and size of the display wall cabinet. I wanted to showcase the sword, the book with the debossed cover art as well as the beautiful illustration of Siegfried with his sword drawn. I made a quick mock-up from pine and blue tape to get a feel for the proper size and presentation. (I later decided to exchange the position of the book and artwork in the cabinet to give more weight to the bottom.)

The next decision was what the cabinet was actually going to look like. Here I agonized a little. I thought about something medieval looking like hand riven oak that was pegged together and perhaps even carved. I also considered the look of dark walnut and how it would highlight the lighter colored sword and greenish-gold color of the book. Though I am still drawn to the riven oak, however I had a nice board of walnut approximately the correct size, that is what I decided upon. A dovetailed case with hinged, glass front would look nice and not distract from the contents. A dust seal would help keep the inside clean. I also had some nice old growth fir that would make a neutral back panel. To give it more of a centuries- old look I enlisted the talent of John Switzer of Black Bear Forge. He hand crafted some beautiful hinges and a hasp that would give it a nice period look.

The Construction
Though it is a simple cabinet some thought went into selecting the best way to utilize the figured claro walnut board I had on hand. I wanted the sides of the cabinet to have a continuous grain pattern around the perimeter but also wanted the edges of the hinged frame to be of similar grain as the sides. Additionally, the rails and stiles of the frame were to be bookmatched. Below is how I rough-sawed the parts.

After sawing, all of the parts were planed smooth and to consistent thickness and width. I was originally going to use protruding dovetails. I later decided that my execution was not good enough so I planed them smooth. You may notice the transition in the pictures. The sides were rabbeted for the back panel and top and bottom cross pieces were added for two purposes. One was to support the ends of the back panel and the other was to provide additional structure for a French cleat. The support on top would also support standoffs for the floating picture of the dragon. The right side of the cabinet had rabbets cut in for the dagger supports. The face frame used mortise and tenon construction with an integral, mitered bead detail around the inside edge. These require careful layout and execution for a good fit. I'll show how I approached it. The back panels were planed flat and smooth and then had a tongue and groove treatment added using dedicated planes.
Follow along with some pictures of the build:

Gang ripping the stock to approximate size. (using a cross-cut panel saw!)

This is the general layout of the rough sawed pieces. Note the resulting grain from sawing the boards per the above diagram.

Planing the frame parts to size, paying particular attention to making everything square.

I like to use a small shooting board to clean up the end grain and size the parts to length all nice and square.Once one board is cleaned up I use it and a marking knife to transfer the size to the matching board. It is very easy to then plane right to the layout line and ensure identical lengths.

These are the dry-fit protruding dovetails I was going to originally use. I botched them up and decided to plane them off. I'll have to try them on another project sometime.

The cabinet pieces with dovetails cut and some sketches to remind me what to do next. The rails and stiles for the face frame are taped together.

It is a little hard to tell what is going on here. I am adding the rabbet for the back panels to the cabinet sides. The larger piece of baltic birch held by the holdfast is the guide and the smaller piece is acting as the depth stop. It is almost foolproof!

The back panels were made from quarter sawed thin maple that I had been saving for "some" project for a very long time. I used some slightly modified, match planes to cut the tongue and groove features into the 1/4 inch thick panels.

Detail of the tongue and groove panels. The edges were later chamfered using a small block plane.

The inside of one side gets two dados to house the supports for the dagger. I defined them with a sharp marking knife and then carefully sawed as much of the sides as I could. They probably should be sliding dovetails but I think the standard dados will be strong enough.

The rest of the work was done with sharp chisels. These are my dovetail style chisels. Note that I use a mallet with them :) Have no fear, they're tough!

Glue up time. I used Old Brown Glue liquid hide glue warmed up in a water bath because it was older than I will admit. I did a test joint first.

Removing the protruding dovetails and cleaning up the surfaces.

It is finally starting to look like something. I hope you are enjoying this project. The next installment will be putting the face frame together.
Be sure to check out my website if you need any fine woodworking tools to help with any of YOUR projects: Blue Spruce Toolworks ....for your finest work!
6 comments
Thanks for the comments. I cannot reply to each comment individually on this blog software. Weird.
Josh:
I pare most of the excess off with a chisel before using a low angle plane. This helps prevent blowout.
Todd:
I have holdfasts from BlackBear Forge and Veritas. They all work but my favorite is the BlackBear forge with the leaf on the end. It has the perfect spring. My bench is about 2-3/4" thick.
Neil, Michael, Jack: Thanks. I will be posting again soon. I am anxious to finish it up!
The case is looking great but I love your tools.
Whenever I try to plane off that much from a dovetail, I get blowout.
I like your work and of course your tools. I have several of your tools.who makes the holdfast you use? How do you like it? I would like to buy a few.
Thanks,
Todd
A wonderful project,I am really enjoying the process and the spirit behind it! thank you for sharing it with us.
Michael Price