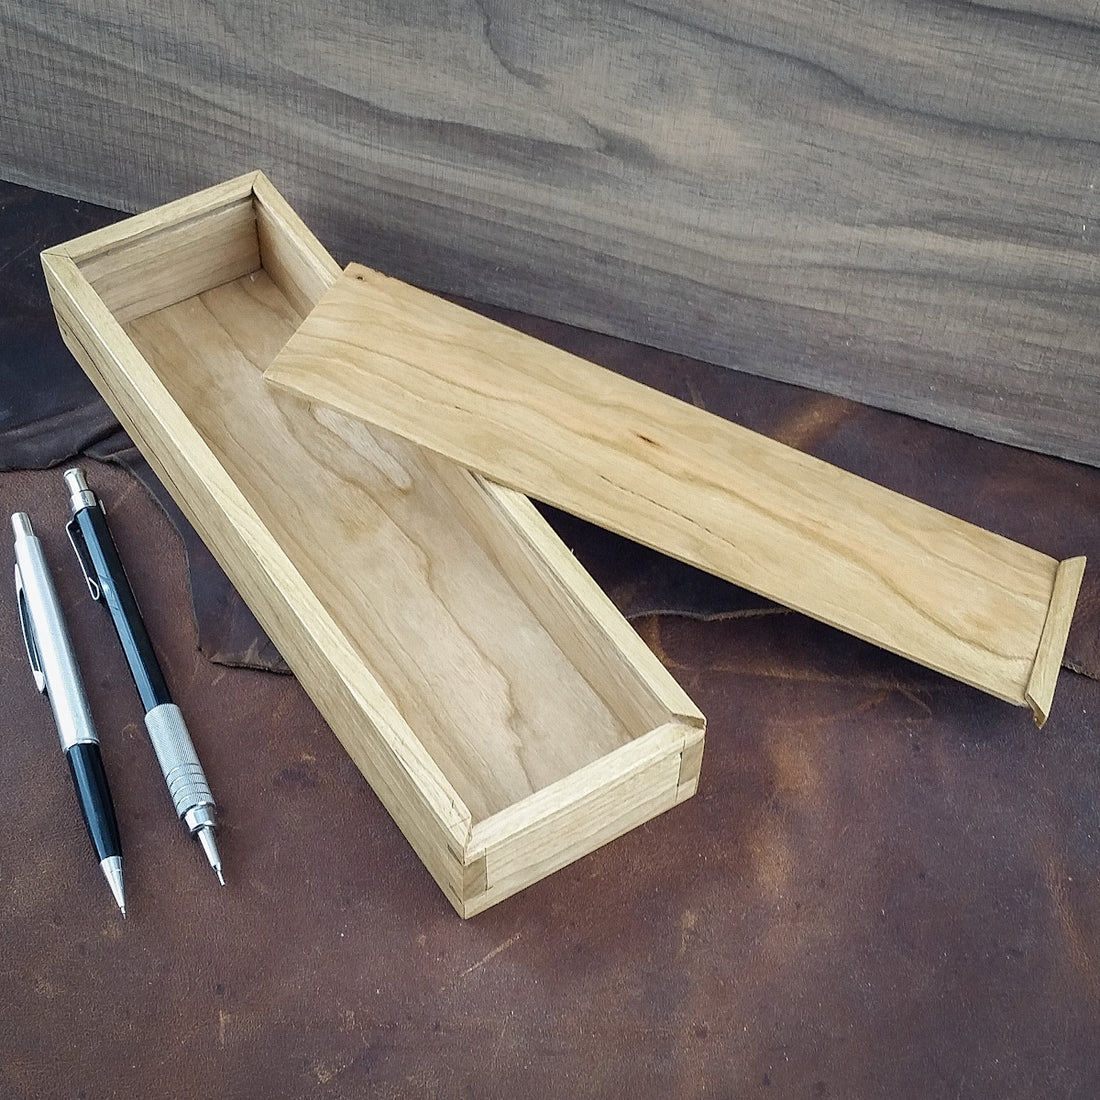
Sliding Lid Box for fun and practice
Just like any other fine skill, woodworking takes practice to keep your game honed. I do not have the opportunity for much actual woodworking as running Blue Spruce Toolworks currently takes the majority of my time, however, every once in a while I like to do a quick project for fun and practice. Such is the case with this little sliding lid box which took about four or five hours to complete. Like most woodworkers I know, I am quick to point out mistakes, sloppy work, etc. but I will just let it go for now. It is obvious that I need more practice! This project can be done entirely by hand or with a combination of hand and power tools. I prepared the stock and added the grooves with the table saw before moving entirely to hand tools. I wanted to try my hand at very small dovetails and showcase an ultra-thin blade marking knife.

I made a small batch of fixed blade knives as specials but the Marking System also can use the same ultra-thin, .020 inch thick blade. I also wanted to try mitered joints which added a lot to the complexity but I like the clean look they can provide. Okay, on to the project......
The rough dimensions of the box are 9 x 3 x 1-1/2, all ratios of 1-1/2. The length was chosen to hold pencils, marking knives, and other small tools. The cherry was ripped to size on the table saw. The sides and top were roughly 1/4" thick while the bottom was about 1/10" thick, the width of my thin-kerf saw blade.

When using hand tools it is essential to have clean, crisp, well defined lines to work to. A marking knife, marking gauge, square and bevel gauge are all critical.

I cross-cut and then used a shooting board to define the lengths of the sides.


A 6:1 ratio marking gauge defined baselines and I used a dovetail marker to layout the tails. Since the boards were so thin I ganged the two sides together for sawing. It went so quickly that I overshot my baselines a few times! Oops.


The waste between tails was "chopped" out using a small detail chisel. The thin blade of the marking knife was useful to clear the waste out from the narrow opening. The second picture shows using the ultra-thin marking knife to define the pins using the tails as the template. You cannot see anything as you mark; proceed lightly and carefully. Make sure the knife is aligned vertically with the side of the tail. Since the blade is so thin it is easy to flex which can move the tip away from the edge. The lines do not need to be very deep, just enough to see.


Cut the pins with a dovetail saw (not shown). Be careful, this is where I made a big mistake! I forgot that the corners were to be mitered and the outside cuts should have been made at a 45 degree angle. I through-cut them. (time for tiny shims.) I used my coping saw to make quick work of the waste between pins. It is nice to use a solid, precision saw to give confidence. Use a miter gauge and marking knife to define the corner miters and cut them with a dovetail saw. I cut close to the line and then refine.


I like to use a miter block to help refine the miters. It is held down using a holdfast. I found that a skew chisel helped to clean up the undercuts. The final piece is a little delicate but adequate for this small box.


My phone (camera) ran out of batteries so I will do a bit of hand waving here.... Some of the joints needed a bit of refining. I tend to cut the pins slightly oversize so they need to be pared down to fit. The lid was made by hand-planing a slight dome until the edges fit into the grooves. Lids are a great place to get creative with inlays, texture, etc. I cut a rebate on one end of the lid and added a matching, mitered trim piece. A little shellac and rub with a non abrasive pad and orange oil finished it off. A box similar to this would make a nice standalone gift or as a presentation box for something really special. It could be made much simpler by using a glued-in bottom and a lid that slid both directions. This would eliminate the mitered corners and allow for through-dovetails. But where is the challenge in that!


General News
Fall is typically very busy at Blue Spruce Toolworks. If you are thinking of a Christmas or other Holiday gift for someone special (including yourself!) be sure to get your order in early. As you may know, we make everything to order, specifically for you, so our lead times can vary quite a bit. I am trying to stock up but we generally run out of some parts before the end of the year.
We have had great reviews on our new coping saw. Thank you for all that have purchased it and I trust it is serving you well. For those that would prefer a dedicated fret saw, hold on, because your wish is about to come true! Other tools in the works include a miter square, smaller bevel gauge and new dovetail marking gauges. Plus more on the way. So stay Tuned. Follow me on Instagram at blue_spruce_tools for fun and excitement. Have a great fall season and I hope you can get in lots of shop time.
Dave
2 comments
Will mke nice gift
Dave,
Nice to know other ‘arisans’ make mistakes. Unfortunately, yours are openly displayed. I can zip thru planing the butt sections of my bamboo fly rods and leave the occasional open seam………
knowing full well that the cork grip and reel seat will hide my errors. Have to be very careful elsewhere though.