Slaying Dragons, Part 4 - Cabinet work, continued
This is part 4 of a series. If you are just joining, you may want to catch up with previous posts:
https://bluesprucetoolworks.com/blogs/projects/slaying-dragons
https://bluesprucetoolworks.com/blogs/projects/slaying-dragons-part-2
https://bluesprucetoolworks.com/blogs/projects/slaying-dragons-part-3
With the base cabinet glued and cleaned up it is time to tackle the door. I chose to use blind mortise and tenon construction for a lightweight but strong frame. After truing up the rails and stiles to approximate dimensions and refining the inside edges using a handplane, I laid out the mortises using a marking knife, square and marking gauge (made by Hamilton Woodworks).

The mortises were chopped using a traditional style mortise chisel and a Blue Spruce Mallet of course :) I find that a small "custom-made" sight-guide clamped to the work piece helps to make sure my mortises come out straight and true. I imagine with more practice I will not need this help.


All Cleaned up. I transferred the tenon layout onto the rails. Unfortunately, I somehow lost all of the pictures for this portion of the project so the tenons will magically appear! They were marked out using a marking knife and square and then sawed to the lines. Paring with a sharp chisel where needed ensured a nice fit to the mortises.
The inside edges of the door frame will have a mitered bead detail. I used an antique molding plane for this work. The first step is to add the bead down the entire length of the stiles and rails. This is a 1/8 inch bead.

A miter is needed on the bead where the rail meets the stile. A portion of the stile is removed up to the edge of the quirk or groove. I sawed this feature close to the edge and then refined it with chisels and guide blocks.

The rail needs a simple miter. Again, I used a guide block to ensure a flat and true 45 degree face..

After checking the fit and refining as needed, it was time for the glue up. Note the extra material on the stiles to help keep the mortises from splitting out while chopping. Also note that the outside of the frame was made slightly oversize to allow precise fitting to the case sides.

After the glue dried overnight I sawed off the extra stile material and cleaned up the whole frame with a hand plane. I fit and clamped the frame to the cabinet and planed the outside edges of the frame to be flush with the case.

I needed to add a rabbet on the back side of the frame to hold the glass and also a groove along the outside edge to make a dust seal. I figured it would be easy to do with a small (electric!) router I found at a garage sale. I know that the use of power tools needs practice to gain a level of expertise, just like hand tools. I needed to practice more with this little router. I almost exploded it into a million pieces by throwing it against the concrete floor after I botched it! (It would have made an interesting YouTube video) I could not see what I was doing so I taped a LED flashlight to the base. I still couldn't see what I was doing because of the small opening and lots of dust, but I took very light cuts until I finally ended up with something that looked like a rabbet all the way around the inside of the frame. I sighed a big sigh, picked up my chisel and let my stress melt away as I cleaned up the corners in my quiet and dust free space.
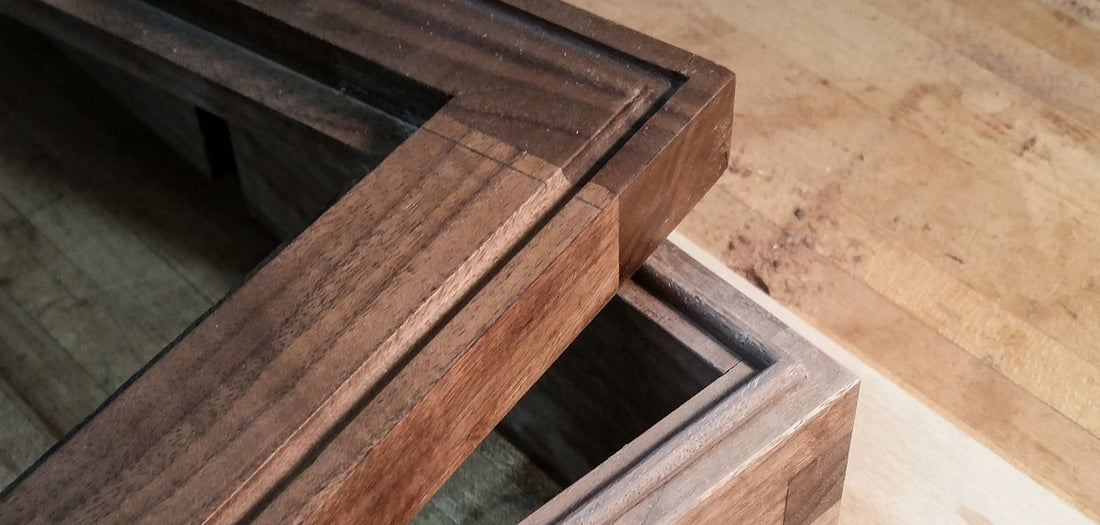
However, my router wows were not over yet. Another feature that I wanted to add to the cabinet was a dust seal in the form of an interlocking bead and groove. To make it I planned to route a 1/8" x 1/8" groove around both the cabinet and the face frame. Then, on the cabinet side, I would insert a piece into the groove similar to a cockbead. With the cabinet door shut it would interlock with the matching groove, seal and hopefully keep dust out of the cabinet. To make the groove I used the dreaded router. (I apologize to those who love their routers) I attached a homemade base with a fence and taped on the flashlight so I could almost see what I was doing..

A 1/8" bit did the work. Next time I will use a scratch bead by hand! I have a few places where I need to add material back; c'est le vie. Back to hand work; I used a cockbead plane to round over the insert pieces.

And this is the final result. And, yes, I messed up with my layout lines! Gives it that handmade look. :0 Note to self, do not mark so deeply next time. But the dust seal should work and really locks the two pieces together.

Now that the case, frame and backboards are basically completed, it is time for some finish work and assembly. Yes! I will work on doing this over the weekend and post the final results in a few more days! Anybody want a router, cheap? Time for a garage sale.
Dave

2 comments
It is so cool to see this side project. Getting to see the tools you use and how you approach an idea is terrifically insightful and interesting, thanks for sharing!
Really enjoying watching the project come along. Refreshing to see that we all encounter gaffs along the way. And it is true, nobody can see what is going on while using an electric router.